Whether you redecorate a whole space, accentuate a small area, or regenerate old furnishings, offering walls an instant improvement with spectacular distressed wood would give your room or house a nice fresh look. It can, nevertheless, be an issue, particularly when it’s your first time. If you can’t start and do it properly, don’t panic!
This post will instruct you on how to distress wood paneling step-by-step to make your space stunning. Let’s look at seven procedures and strategies to efficiently give your property a fresh appearance.
- Cover the floor
- Paneling preparation
- Address molds and holes
- Sand the wood paneling
- Stain the wooden panels
- Distress wood paneling
- Sand one more time
Table of Contents
Distressed Wood, What is It
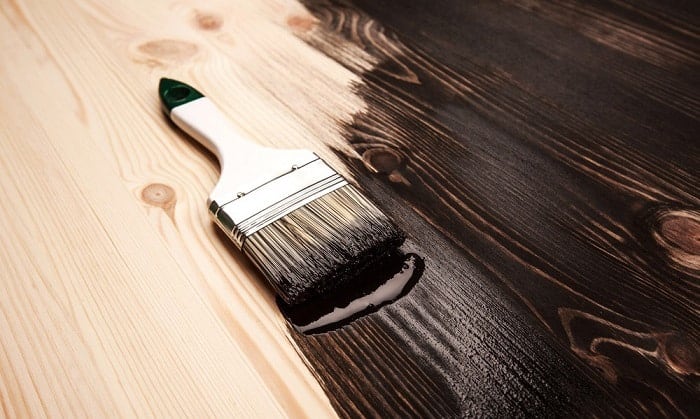
“Distressing” wood typically involves altering it, utilizing equipment or chemical substances to make it look aged or antique.
Wood paneling that is distressed looks ancient and weathered, with a roughness and a rustic homey attraction. You may buy wood that is rescued from old barns and which have been weathering for many years from some wooden shops. Or sanding off some of the paint spots on the wood paneling.
In fact, the fastest and most manageable way to distress wood is to redecorate by sanding and painting. This approach works fantastically both on painted and unpainted timber. The goal is to sand random parts that are bumpy to make them look natural. Likewise, various ways are available to get a distressed appearance by roughing the surface up.
Why Do You Distress Your Wood Paneling
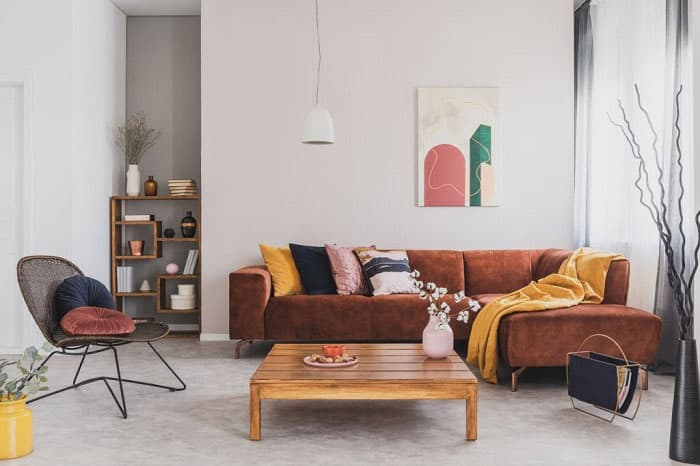
The distressed wood may also offer your home more intriguing textures and distinct colors. These features are usually committed after the style of military, village, and farmland.
Not only that, trendy decoration has made ancient wood unbelievably precious. Moreover, most houses have utilized smart, highly polished wood panels which still appear fresh in the last 20 years. But they often become outdated since the taste for design has changed a lot.
Distressed wood also saves your home from the threat of an unintentional pest infestation. The rough-up of the wooden surfaces eliminates breeding and nesting spots for such unwanted insects.
What are Your Materials
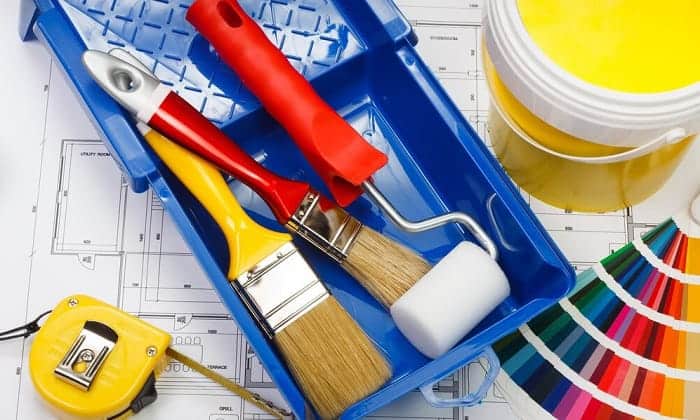
For your panels of distressed wood, you’ll need different tools. However, in carpentry or residential construction, you don’t need to have any experience. A basic comprehension of house maintenance will be sufficient. To get this job done, here’s what you’ll need.
1. Materials
- Latex paint/Acrylic paint
- Poly sheeting
- Heavy-duty degreaser
- Dishwashing liquid
- Cloth
- Vinegar
- Spackling compound
2. Tools
- Putty knife
- 150 grit sandpaper
- Paintbrush
- Sponge
- Bucket or roller tray
- Hammer
- Cleaning wipes
How to Distress Wood Paneling
Distressing wood paneling is a straightforward and affordable approach to create a fresh contemporary appearance. Although it might sound like a hard procedure to modify the design of paneling, it is uncomplicated. All you need is paints, sandpaper and a spare day to change your paneling.
You need to understand the appropriate preparation and painting skills to avoid any failures before you begin painting. So, how can you produce a worn surface purposefully, but still keep it natural? Let’s take a look at the guidelines described below.
Step 1. Cover the floor
Before starting to paint, floor protection is one of the first measures to ensure your floors are protected.
- Clean the surface: Minimize the gathering of big particles of dust that may harm your equipment as well as your floors.
- Cover the surface: Shield the entire floor with poly sheeting.
- Tape sides and corners of the floor: Pay special attention to both corners and edges of the poly sheeting to prevent you from sliding down on the floor during painting.
Step 2. Paneling preparation
Preparing is an essential step when you paint wood paneling to look distressed. This means that all layers of polish on top of the panel will be removed.
- Clean the panels: Thoroughly wash away dirt and dust with warm water and a sponge.
- Use a heavy-duty degreaser: If the wall has persistent greasy grime, wash it with dishwashing liquid or grease-cutting detergent.
- Finish with a wet towel: Wipe the substances off the wall with water and a damp cloth.
Step 3. Address molds and holes
Whatever room you prepare to paint, make sure you address any mold or mildew. Do not paint on top of them as they will expand with new paint, making it much more difficult to clean and maintain.
- Make a mixture of water and vinegar: Mildew may be removed with a sponge and a mix of around 75% water and 25% vinegar.
- Apply the mixture: Once you finish putting the substance on the wall, let it sit for a few minutes.
- Clean the infected area: Brush and rinse the surface with clean water. Remember to wear gloves and safety glasses.
- Spackle holes: Use spackling compound to seal any holes and undesirable grooves.
- Remove redundant elements: Scrape away the surplus parts with a putty knife.
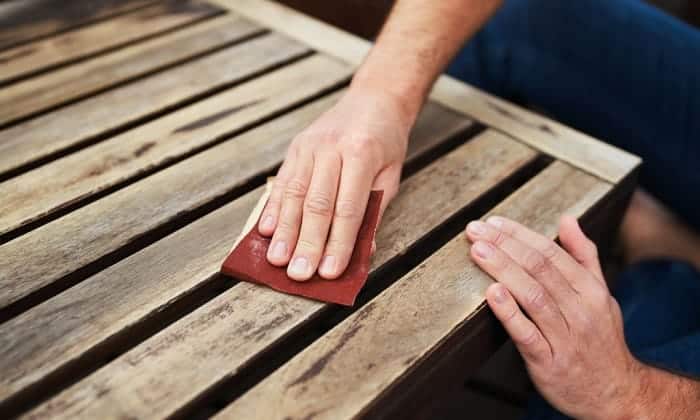
Step 4. Sand the wood paneling
Whilst sanding is not essential in all the projects of painting, rough areas on the walls must be sanded to ensure that the paint fluctuates smoothly before it is applied. Sanding is used to eliminate flaws on walls, ceilings, floors, ect. It is also used for rough surfaces to adhere easily while painting.
- Sand the walls: Use 150 grit paper to fix uneven parts once the spackle has hardened.
- Get rid of the stain from the wet surface: Remove the rest of the sheen on the panels to adhere well to the paint.
- Wipe away dust with a damp towel
- Let it dry thoroughly
Step 5. Stain the wooden panels (Non-compulsory)
Wood staining is not required when you want a plain whitewashed appearance. Nevertheless, it not only gives more intriguing and dimensional effects to its texture but also highlights the natural lines on the wood. You may skip this stage if you don’t want to take risks or spend too much effort. But if you are interested, look at the wood staining direction below.
- Prepare the stained paint: Pour either Latex paint or Oil-based Primer into a roller tray.
- Dip the cloth into the stain: Use a wet rag, a standard paintbrush, or a sponge, to paint the wood tiles. A cloth is recommended to produce natural patterns of wood distressing.
- Slightly apply to the timber: Rub the cloth on top of the board. Continue to go back and forth so that the paint soaks into the wood.
- Change your pattern on each board: Don’t repeat the same thing that you went with to make it appear older and natural. Attempt to differentiate each board.
Step 6. Distress wood paneling
To paint wood paneling to look distressed, the main element of this stage is not to seek perfection in painting. Wood coatings with distress are generally painted white, dark brown, black or grey. Even so, steel blues might work wonderfully, according to the architecture of your house. There truly is no rule or boundary on the color of distressed wood.
- Create a paint mixture: Combine the paint, either Latex or Acrylic with a little water in a bucket or a roller tray and stir it for a few minutes. Do not use the color directly from the paint container since it is too dense.
- Apply to the boards: Start on the top of the wall and proceed with a brush or roller downwards slowly.
- Mimic wood’s edges: Focus on the edges with the paintbrush, as wood gets worn on the edges first when it’s distressed or made to look ancient.
- Rub a wet cloth over the edges of the paint: Just apply a little color at a time and slightly scrub the color off. Do not make a flawless straight line because it won’t appear natural.
- Let the first coat dry until the second one is applied.
Step 7. Sand one more time (Non-compulsory)
In the end, finishing up your distressed wood paneling with the sanding procedure gives it the ultimate taste and assures that it doesn’t seem to have been painted recently.
Sand tiny sections in patches: The aim is to randomly eliminate a very small amount of white paint to let the black color below spike out, which provides the idea that the paint has worn away over the years.
Conclusion
With a little knowledge and the appropriate techniques of distressing wood paneling, you can upgrade the appearance of your house and make it seem totally new instead of reconstructing the whole wall if you don’t like the current paneling anymore. Remember to add flaws and irregularities which transform every wood panel into a distinctive piece of art.
You can find different strategies to paint wood paneling to look distressed via this article. Has this article on how to distress wood paneling been effective? Please kindly leave your thoughts in the comment section and share it with your friends and family if you enjoyed it.